Bandsaw blades are used in very demanding environments. The blade between pulleys and guides is strained to several thousands of kilograms. The rotation speed of the blade varies between 30m/s and 70m/s and pieces are fed into the blade at a speed up to 100m/min.
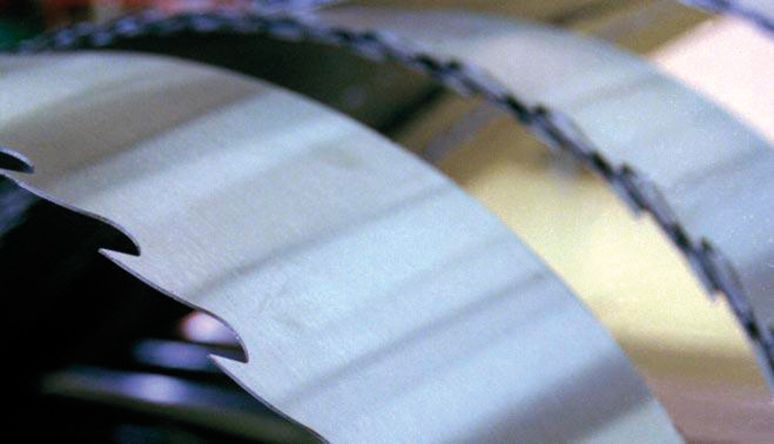
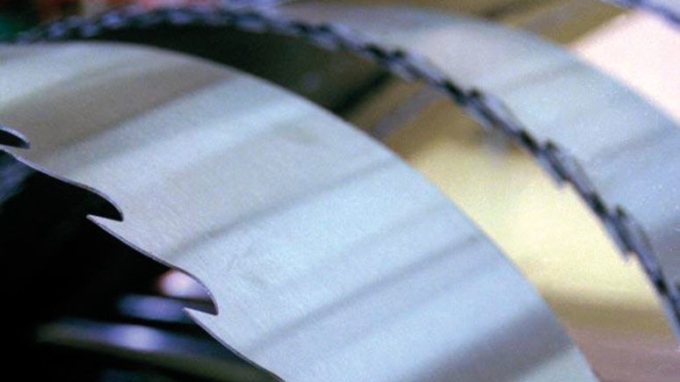 Bandsaw blades are made of cold-rolled carbon
steel. © Nordic Sawmill Support Oy
Material and properties of bandsaw blades
The most commonly used blade material is cold-rolled carbon steel. In industrial bandsawing, the most frequently used material thicknesses are between 0.7mm and 1.8mm and widths are 60–260mm depending on the blade and intended use.
Well-known blade material manufacturers include the Austrian company Uddeholmstrip and Japanese Daido.
Choosing bandsaw blades
When choosing a bandsaw blade, factors to consider include length, width, thickness, toothform, pitch of teeth and rake angle.
- The length of blade is determined by the machine in which it is to be fitted. The blade length is defined by the number and pitch of teeth.
- The blade’s width is also determined by the machine. Maximum width = pulley width + tooth height + 5mm.
- The thickness of the blade is determined by the diameter of the pulley. The blade should not be thicker than one thousandth part of the pulley’s diameter.
- The toothform depends on the species and quality of the timber to be sawn.
- When choosing the pitch, one should consider cutting and feeding speeds, cutting height and the quality of the timber. In dry ripping, commonly used pitches are 30–35mm and 45–50mm when sawing fresh logs.
- The rake angle for hardwood species is 12–25 degrees and 26–34 degrees for softer species. Higher feed speeds require a bigger clearance angle. Angles from 8–16° are commonly used.
When sawing green timber, doubling the blade thickness will give sufficient kerf and clearance. For dry wood, this can be reduced by 0.10–0.20 mm.
The following formulas can be used as rules of thumb to help in blade selection:
- Thickness of blade = pulley diameter/1,000
- Max. tooth height = blade thickness x 10
- Pitch of teeth = tooth height x 3
Manufacture of bandsaw blades
The bandsaw blade manufacturing process includes stages such as toothing, cutting, joining and tensioning. Depending on the blade type, the next work stage is either swaging or tipping, after which the teeth are sharpened and side grinded to achieve the desired working clearance.
Toothing, cutting, welding and grinding
- Blade toothing can be performed in a number of ways. The most common way is to punch them using an eccentric press with an automatic feeder. In the punching method, the tooth form is made by a punch made of tool steel and a die.
- The bandsaw blade is cut to the correct length by heavy-duty cutters after toothing. For the blade to be straight after welding, the cut ends must be at a 90-degree angle to the blade’s back. The length of the blade is defined by the number and pitch of the teeth.
- Welding is the most common way of joining bandsaw blades. Welding weakens the properties of the joint. During welding, the material melts and solidifies very quickly. For the properties of the welded joint to correspond to the rest of the blade’s properties, the joint must be heated or tempered at around 400°C for 5–10 minutes after welding.
- After welding, the blade is fixed on a curved grinding table where its top layer is grinded off and the joint is polished. By using an elastic grinding wheel on the angle grinder, you avoid grinding off too much material.
Levelling, tensioning and stretching the back
Levelling and tensioning the blade and stretching its back are interconnected tasks that must be performed in turns or even simultaneously when the blade is being made or maintained.
- Tensioning means stretching the blade’s middle section so that it is longer than the edges.
- Tensioning results in a blade tension that holds the blade fixed on the pulley surface.
- Levelling means either straightening the blade body or levelling any uneven sections, lumps or bulges on the blade body. In order for the blade to saw straight, the tooth edge must be tighter than the rest of the blade. This is why the back is stretched longer than the rest of the blade.
All three tasks are usually performed using a hammer, a tensioning bench and stretcher rolls where the blade body is pressed between two symmetrical rolls. In order to achieve good blade tension, the rolls must be correctly centred. The rolls must also have an identical radius and form.
Tensioning and levelling machines are useful if there is a high number of blades to manufacture or service. These machines will automatically level and tension the blade according to given settings.
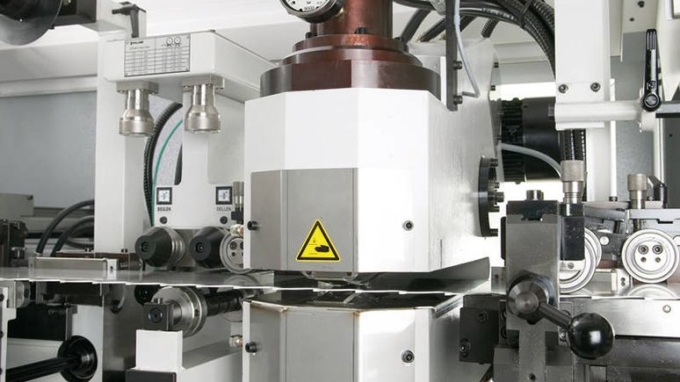 Tensioning machine.
© Nordic Sawmill Support Oy

The following are some of the factors affecting the amount of tension needed: width and thickness of the blade, degree of crowning, tightness of the blade and the saw feeding speed.
Sawing clearance
The aim of spring setting, swaging or stellite tipping is to create sufficient clearance between the blade and the wood.
The purpose of the clearance is to reduce friction between the blade and the wood so that the blade does not get overheated. Sufficient clearance is determined by the properties of the wood being sawn.
The higher the fibre content and the softer the wood, the bigger the kerf has to be to prevent friction against the fibres on the surface of freshly sawn wood.
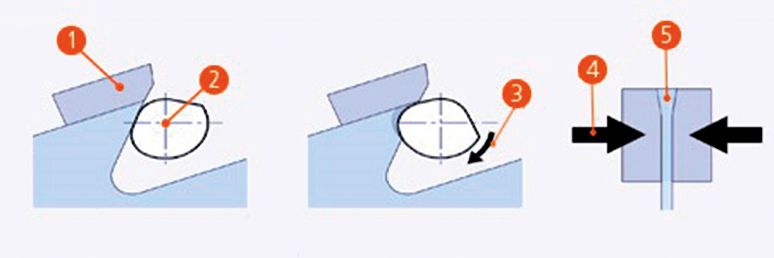
Swaging
Swaging is a cold forming method where the tooth tip is made wider than the blade body.
Before swaging, teeth must be pre-grinded to straighten the face surface and save time in the final grinding stage. If the blade is being reswaged, the old swaging should be grinded off.
Swaging can be carried out using automatic machinery. The purpose is to create an edge and improve the durability and hardness of the tooth.
- In the first stage, the anvil (1) presses against the back of the tooth and the swaging bar rotates against the tooth’s face
- spreading the blade material to the sides (2) and up (3).
- In the second stage, the equalising jaws (4) clamp around the tooth and give the tooth (5) its final geometry and clearance angles.
- This forms the cutting edge and the desired working clearance. Equalising can also be performed with a side grinder which may achieve better accuracy, but some of the hardness will be lost.
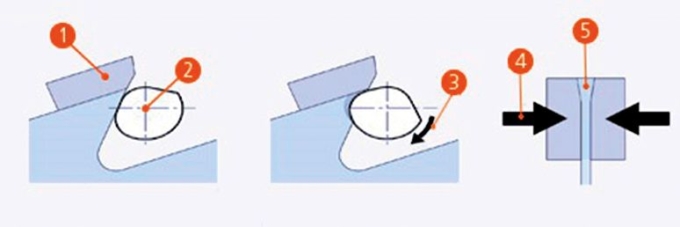 The stages of swaging a blade.
© Suomen Hiontakone Oy/Vollmer
Tipping
The operating life of a bandsaw can be extended by tipping the teeth with a stellite-like, hard-wearing alloy. This has been observed to be true especially when sawing harder species. Today, stellite is used for sawing the traditional species of timber, such as spruce and pine, as well as the more exotic species
Stellite is an alloy that mainly consists of cobalt. Depending on the alloy composition, there are several different grades with different mechanical properties.
Compared to the carbite used in circular blades, stellite is a soft material. However, it does hold well against mechanical and chemical wear and it is not very brittle. Grinding stellite does not require any special machinery, grinding fluids or grinding wheels. As stellite maintains its structure well at high temperatures, it withstands grinding well.
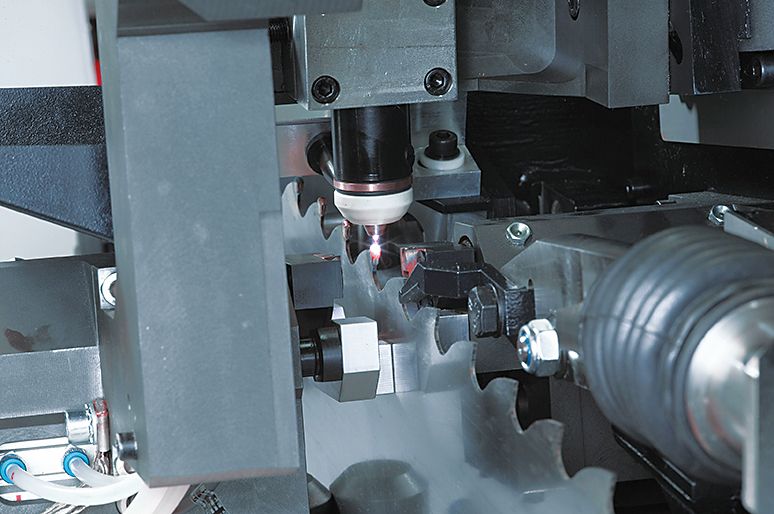
The most common methods include automatic tipping machines and the plasma arc welding (PAW) or electric resistance welding (ERW) methods.
- In plasma arc welding, an electric arc acting as the heat source burns between the tungsten electrode and the work piece. The stellite or another type of welding rod is brought under the plasma torch. Under the torch, it melts into a die placed around the tooth tip.
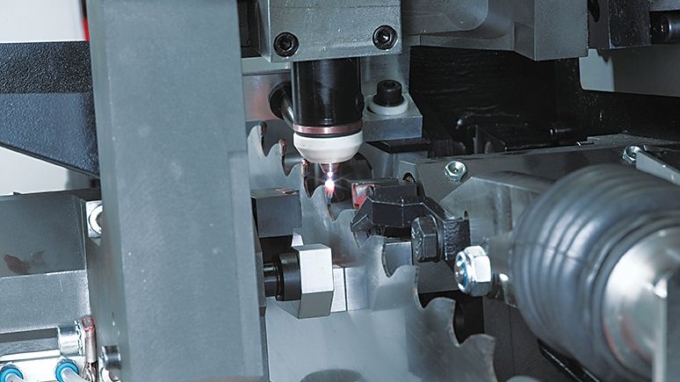 Tipping with plasma arc welding. © Suomen Hiontakone Oy/Vollmer
2. In electric resistance welding, the tooth and ready-made stellite tip to be welded are heated using a strong electric current. Both of the heated pieces are pressed together and so become welded together. The high temperature softens the material so that the two pieces can be pressed together. The teeth must always be grinded to achieve the desired final tooth geometry regardless of welding method.
Tempering
Whichever tipping method is used, the tipped teeth must be tempered. Tempering refers to thermal treatment after hardening. During tipping, the blade material under or behind the stellite heats up to a hardening temperature. Due to the carbon content of the blade material, the material becomes coarser, harder and brittle. Tempering weakens the hardness of the area exposed to thermal treatment and reduces the risk of the tooth or tip breaking.
Tempering can be performed using a plasma torch, high-frequency tempering unit or gas torch. Whichever method is used, it is important to work in a controlled and repeatable manner. This is important for ensuring that each tooth is tempered at the same temperature for the same amount of time.
Sharpening
The purpose of sharpening and grinding bandsaw blades is to either make the teeth sharp or to manipulate the shape of the tooth through pre-grinding. Grinding can be done using a grinding wheel which is a wheel that has a high number of geometrically varying and sharp grinding particles. The tooth’s rake and clearance angles are adjusted by grinding.
There are two different grinding methods depending on the grinding machine used:
- The traditional dry grinding that uses ceramic wheels and
- wet grinding which has become more and more popular in recent years, especially when working with stellite. Grinding is usually done with ceramic or Borazon (CBN) wheels
Modern wet grinders allow for the free programming of the tooth and wheel shape, and they perform the sharpening automatically according to the settings given. By choosing wet grinding and the correct grinding wheel, the risk of gullet cracks can be reduced.
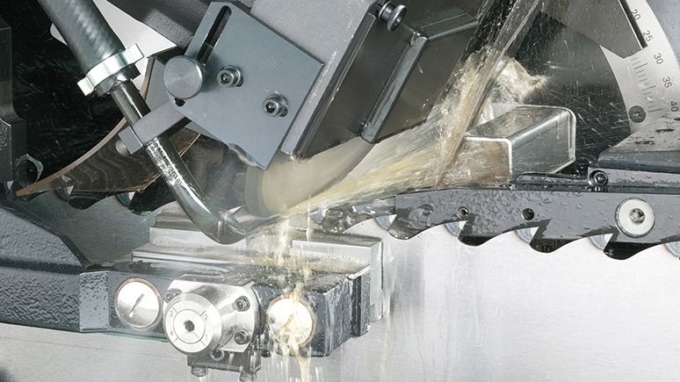 Bandmill blade being sharpened.
© Suomen Hiontakone Oy/Vollmer
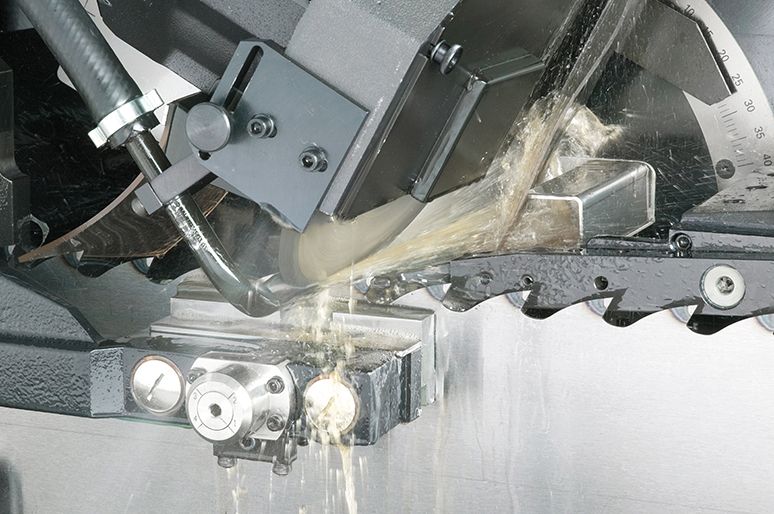
During grinding, the tooth’s feeding speed and the rotation speed of the wheel combined with the depth of grinding must be adjusted carefully, and the shape of the wheel must correspond to the gullet curve exactly. There should be no dark areas in the bottom of the gullet after grinding. Dark areas suggest that the steel has been overheated and then cooled down very rapidly. This causes friction-induced martensite which is an extremely hard and brittle material that can easily be the beginning of a crack in the gullet as the tensioned blade bends over the pulley.
Side grinding
Side grinding creates the final kerf and sawing clearances. In particular, new tipped blades must be side grinded after sharpening. If the clearances are uneven after swaging, the swaged tip can also be side grinded.
The sawing clearance of a new blade is usually 0.5–0.9mm. A bigger clearance enables more regrinding before swaging or tipping is performed again. However, cutting resistance and material loss limit the use of big clearances.
Maintenance of bandsaw blades
Maintenance staff can use service cards in which details related to each blade, such as sawing time, behaviour and maintenance measures performed, are recorded. Detailed monitoring of blades provides important information on the life cycle of blades, the most common maintenance measures and the condition of the sawline. This information can be valuable when trying to improve operations.
Many maintenance measures are the same as those performed when manufacturing a new blade. In order to keep blades in a good condition, these measures should be carried out after sawing:
- Clean the blade.
- Check the gullets, blade body, joint and old welds, teeth and their straightness and sharpness, kerf, tension and curviness of the back.
- Repair any gullet cracks and the tension and curviness of the back if necessary.
- Pre-grind, swage or tip if necessary.
- Sharpen and side grind if necessary.
The maintenance of sawing machines is also closely linked to blade maintenance. Because the bandsaw blade is the weakest link in the machine, the following factors should be regularly monitored between the log feeders and receivers: The condition and bearings of the pulleys, scrapers and cleaning felt and blade lubrication equipment and blade guides.

